Parts needed
1 switch
2 leds
1 bottle
1 5v power supply
1 100k resistor
2 pieces of wood one big enough to fit the bottle on and one to go inside the bottle
Wire
Wire
step one
Drink a bottle of beer or glass bottled drink of choice I drank a Coors light so that's what I will be using in this project I then used a Dremel to make a hole I the bottom of the bottle (use a low speed on the Dremel and wear safety glasses)
Step two
I soldered the cathode of the first led to the anode of the second
Step three
I soldered a wire to one pin on the switch and heat shrank it
Step four
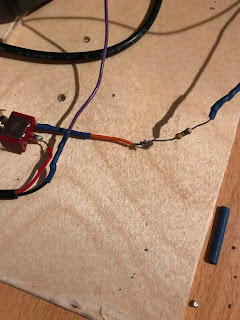
I then soldered the 100k resistor to the wire coming from the switch
Step Five
I then soldered the resistor with a wire to the anode of the led pair
Step six
I then soldered a wire from the cathode side of the led pair to the - side of the power supply.
Step seven
I then soldered the + side of the power supply onto the switch and that's the wiring competed
Step eight
I drilled a hole in the bigger piece of wood and fitted the small piece into it I held it with super glue.
Step nine
I taped the led to the top of the small piece of wood and glue the switch in place
Step ten
I placed the bottle over the top and that's the project finished it's not very bright in the daylight I post a picture of it in the dark on my twitter later on today .
improvements
I think the first improvement I would make is to paint the base then Id find a more powerful led to go in it also I would like to fit a pot so I can dim the light but I am going to use it on my bed bedside table .
hope you enjoyed this project
Dobby


No comments:
Post a Comment