Components needed


Buzzer 220 ohms resistor


Led Tilt switch
Setup
this is a very simple circuit to setup
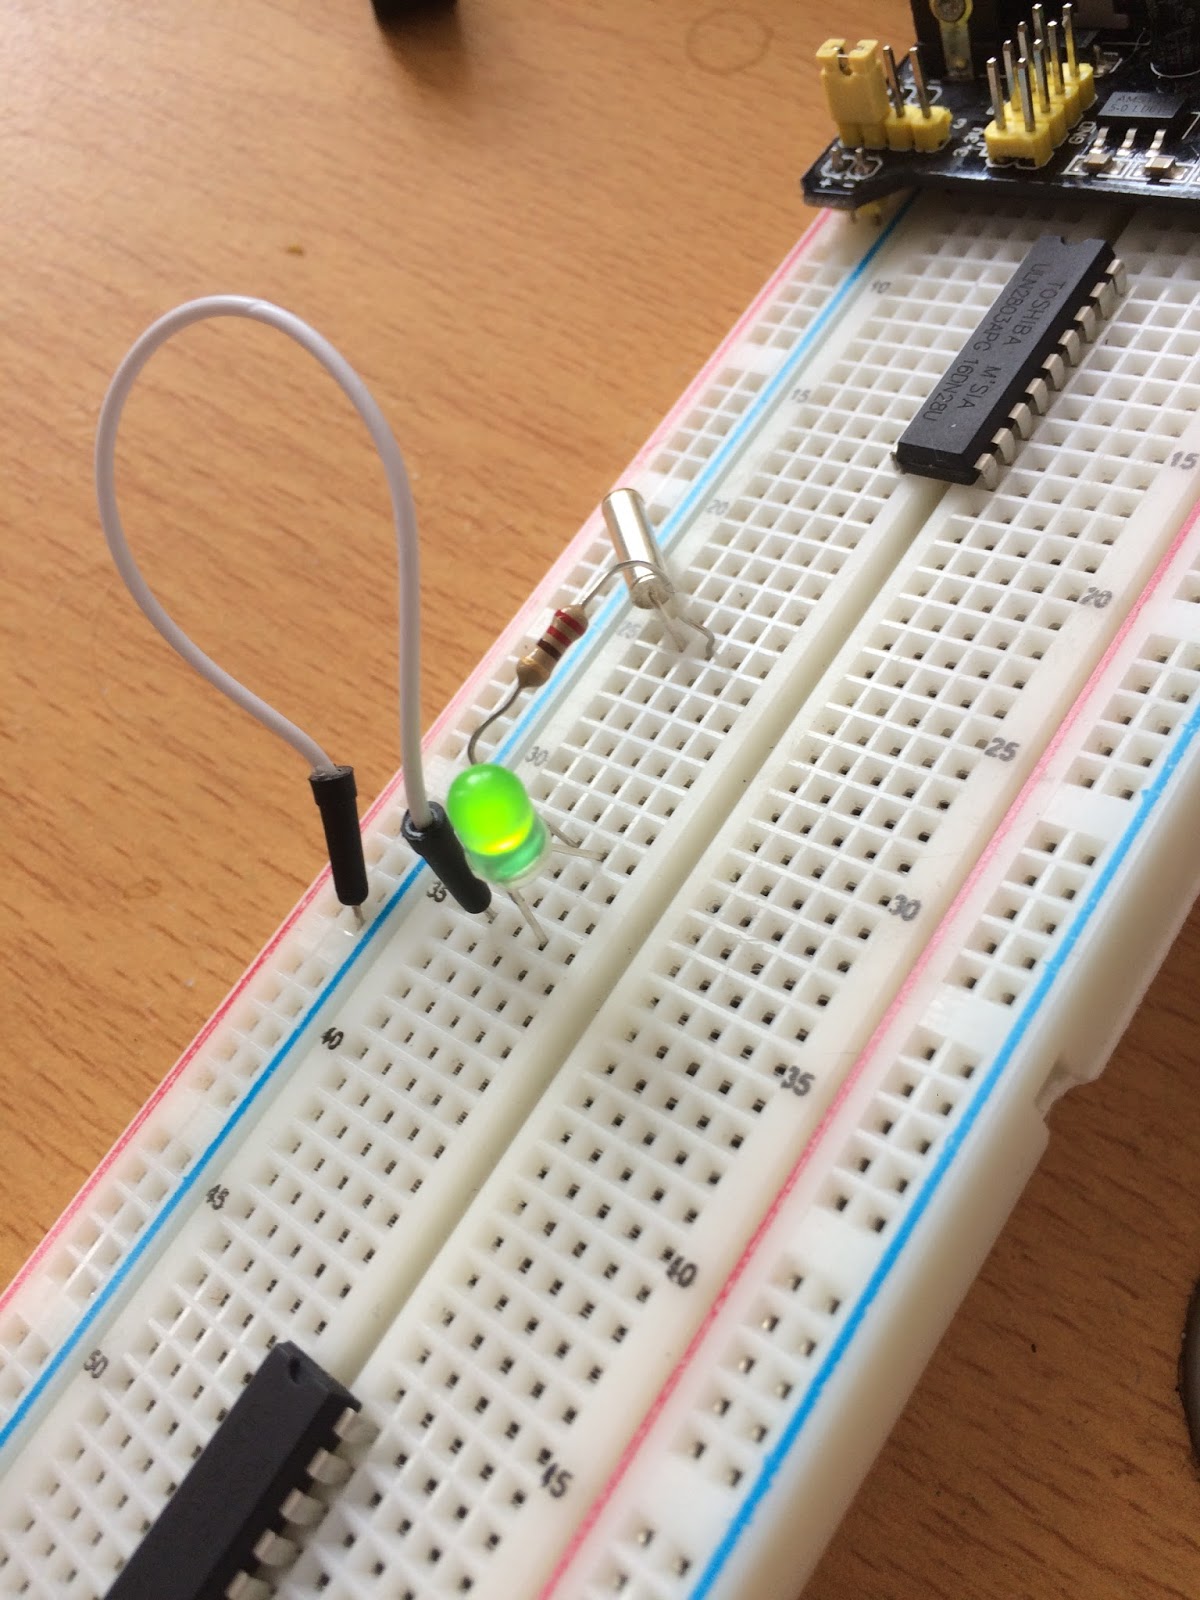
 Step 1 attached the tilt switch to the + rail on the board and the other end to an empty row .
 Step 2 attach the 220 resistor to the same row as the tilt switch and the other end to a empty row
 step 3 A attach the anode side of the led to the resistor and the cathode to the - rail using a jumper wire
 Step 3 B instead of using an led use a buzzer for a audible circuit


How it works
there is a small ball inside the tilt switch which can be set to complete the circuit in two ways the first being if the circuit is tipped or tilted the power is cut thus turning the led off and the second being if the circuit is tipped or tilted the power is allowed to flow thus completing the circuit and causing the led to come on or the buzzer to sound .


Fritzing layouts
Here is the Fritzing layouts


Hope you like this circuit and I will bring you another next Monday
Dobby

No comments:
Post a Comment