Good afternoon folks and welcome to another Project day this weeks project is the bench power supply

Why I made this project
I make this power supply to solve my problem of not having the right voltages for testing and this does that. I have the following voltages on the power supply 3.3, 5 and 12 plus an adjustable voltage supply that can supply from 1 to 38 volts which will come in very handy in the future.
Parts Needed
- a pc power supply (I used an old one that I removed from a old pc )
- 4 4mm binding post
- a buck/boost power converter
- 2 leds I used a red and a green one
- 2 100k resistors
- a dummy load resistor
- 4 ring connectors
- 4 nylon spacers
- a usb jack (I used one that I removed from a pc )
I used heat shrink on all of the connections
Step one
The first step is to open a the power supply up this is normally only a few screws ( make sure it is not plugged into the mains )

Step two
the next step is to cut and group the wires together by colour you should have 4 bundles(red 5v, orange 3.3nv , yellow 12v and black ground )plus 3 coloured wires (purple standby , brown 3.3 sense and green power on ) there may be a few other wires left over which I just cut and wrapped in electrical tape just so the couldn't short out.


Step three
the next step is the join the brown wire to an orange wire this is a very important step is these wires are not connected the power supply will not work .

Step four
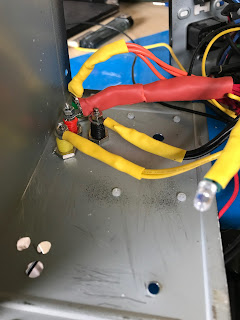
the fourth step is to solder a 100k resistor to the purple wire and a orange wire then solder those wires to the anode of two leds (I used red for the standby purple wire and green for the orange wire which is the power on indicator) then I soldered a black wire to the cathode of each led


Step five
the next step is to solder the green and a black wire to the switch

Step six
the next step is to drill holes in the case for the switch , the two leds, the usb jack and four binding post as well five holes for the power converter spacers and attach them to it


Step seven
the next step is to cut the wire bundles to a good length then twist and tin the ends of each bundle then attach a ring connector to each of the wire bundles then attach them to the binding post and also fit the switch and leds into place .


Step eight
the next step is to feed a yellow and black wire out to the back of the power supply then another pair of the same colours out of the hole for the power convertor and red and black wire for the usb jack in the front the put the power supply back together .

Step Nine
next up is soldering the two wires at the back of the power supply to the dummy load resistor.


Step Ten
the tenth step is to connect the yellow and black wire to the power convertor and attach it to the front

Step eleven
the last step is to solder the red and black wires to the red and black wires on the usb jack (I taped this up afterwards )


How I could make this better
I think the main things I would change is the spacing on the binding post and possibly use a different power converter but apart from that I think this is a pretty good build and I am very pleased with it.

No comments:
Post a Comment