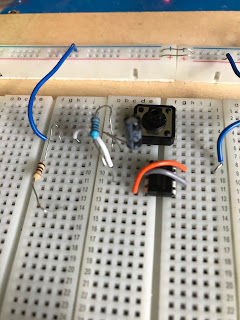
Good afternoon folks and welcome to another Circuit Monday todays circuit is A latching switch
Components needed
1 LED
1555 TIMER
1PUSH BUTTON SWITCH
1CAPACTIOR
4 RESISTORS
all my Circuits are breadboarded on the prototype board I made here
Uses for this circuit
you can use this circuit for turning on and off power to all sorts of things
Step one
place the switch and the 555 timer on the board
Step two
connect pin 2 to pin 6 then connect pin 8 and 4
Step three
connect pin 8 to pin 6 with a 10k resistor
Step four
connect pin 1 to pin 6 with a 10k resistor
Step five
connect the capacitors negative lead to pin 1 of the 555 timer
Step six
connect pin 3 to the positive lead of the capacitor with a 100k resistor
Step seven
connect one pin of the switch to the same row as the positive lead of the capacitor
Step eight
connect pin 2 of the 555 a different pin on the switch
Step Nine
connect the anode of the led to pin 3 of the 555 timer then connect the cathode to a resistor that is then connected to the negative rail of the board
Step Ten
connect pin 1 to the negative rail and pin 8 to the positive rail of the board now your circuit ready to test


No comments:
Post a Comment